Welcome to Sprig!
READ ME FIRST
After each edit, hit the “Run” button in the top right of the editor to see your changes.
P.S.: you can also use the shift + enter shortcut.
THIS CODE HAS INTENTIONAL ERRORS.
To complete each step you’ll have to edit the code.
The code for this game starts below this comment.
Made based on this workshop https://workshops.hackclub.com/sprig_dodge/
The goal is to dodge the fireballs.
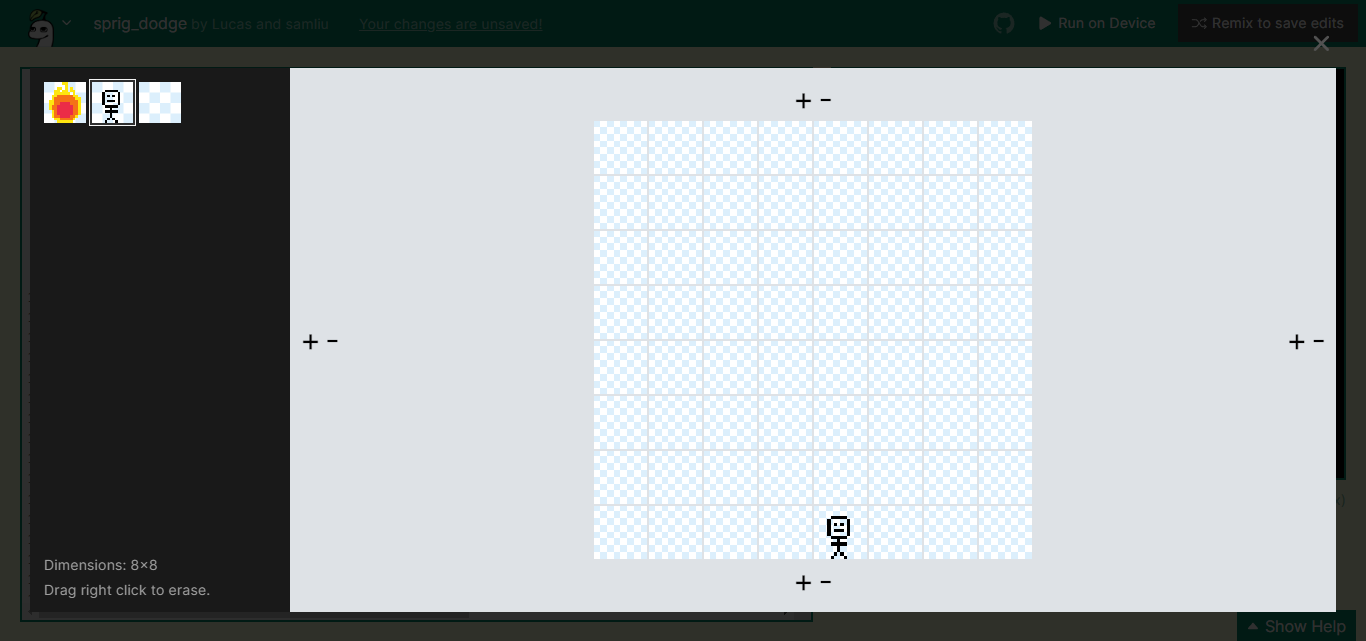
Step 1: Add the player to the map
The basic thing is to have a player on the screen, right? So let’s go! Click on the map and add the player sprite to a tile.
Stuck? Show Hint.
Scroll through the code to find setMap.
I've tried my best. Show Solution.
Sprig creates tile-based games, uses structures like bitmap and map to make it.
bitmap is 1 tile and map is many tiles that bitmap can move.
bitmap don’t appear out of nowhere, need to be added to the map, to do click on map, select player bitmap and place on a tile:
Step 2: Add controls for moving the player to right
Try moving the character around with the a and d keys on your keyboard. You’ll notice that the player can only move left (when you press a).
Your challenge is to add control for the player to move right, use d as input.
Stuck? Show Hint.
Scroll through the code to find onInput.
I've tried my best. Show Solution.
In JavaScript, a function is a block of code designed to do a specific task. In Sprig, an onInput function is used to detect when a keyboard input is given. In our code, we can see that there are two onInput functions for the keys a and d.
We’ll need to add one more for the key d. Type this out below your onInput functions for d.
onInput("d", function() {
    getFirst(player).x += 1;
});
Step 3: Fix the code!
If you have already clicked on Run button, you have already noticed that this error appears:
Uncaught TypeError: Cannot read properties of undefined (reading 'length') on line ... in column 33. Open the browser console for more information.
Stuck? Show Hint.
the getAll() and getFirst() functions are a bit strange, aren’t they?
I've tried my best. Show Solution.
This is a great example of when the error itself isn’t in the line that says error.
If you look at getFirst() and getAll() and knowing what each one is used for:
getAll(type)
Returns all sprites of the given type. If no bitmap key is specified, it returns all the sprites in the game.

getFirst(type)
Returns the first sprite of a given type. Useful if you know there’s only one of a sprite, such as with a player character.
you will notice that they are swapped, after all, it wouldn’t make sense to use getFirst() for some sprite that has several copies on the map.
Step 4: Add all functions in the gameLoop interval
For everything to work, add the functions created in gameLoop.
Stuck? Show Hint.
Use spawnObstacle(), moveObstacles(), despawnObstacles() and checkHit()
I've tried my best. Show Solution.
Just copy the functions in gameLoop:)
var gameLoop = setInterval(() => {
  despawnObstacles();
  moveObstacles();
  spawnObstacle();
Done!
You’re now a Sprig game developer! You have a few options for how to continue on your Sprig journey:
If you feel confident with the Sprig editor and ready to create your own games from scratch,
- Take a look at the Sprig Gallery and collect ideas from games you look through
- Click here to create a new Sprig game
- Once you’re done, submit your game to the gallery and get a free Sprig console
If you’re enjoying hacking on this game, here are some ideas for how to expand on it:
- adding two players
- adding powerups
- come up with your own mechanic!
If you need help, remember that the toolkit (at the top of this panel) is there for you. You can also ask in the #sprig channel in the Hack Club Slack.
Sprig is a tiny construction kit to build tile based games.
The games are written in JavaScript.
It was made by Hack Club, a global community of teen coders who
believe people learn best by making things they care about
and sharing them with others. You can watch this video for an introduction to Sprig website.
Run games by hitting the Run button or pressing Shift+Enter.
Getting Help
If this is your first time using Sprig, try playing through the tutorial. From there, we suggest hacking on any of the current games or starting from scratch.
If you ever need help, have ideas, or want to meet other game-makers, join the community in the #sprig channel on the Hack Club Slack. You can access this guide here.
Level Design
Sprig games are made up of grids of square tiles.
setLegend(bitmaps)
Tell Sprig what types of sprites are available in your game.
Bitmap keys must be a single character.
We recommend storing character keys in variables.
const player = "p"
const wall = "w"

setLegend(
  [ player, bitmap`...` ],
  [ wall, bitmap`...` ],
)
To create a new bitmap, type
bitmap`.`
Those are backticks! Click on the highlighted “bitmap” button to edit your drawing.
The order of sprite types in your legend also determines the z-order of drawing them. Sprite types that come first are drawn on top.
setBackground(bitmapKey)
Tiles a bitmap as the background of the game:
setBackground(spriteKey)
This only changes the visuals of the game.
setMap(level)
Designing a level is like drawing a bitmap:
map`...`
The characters in the map come from the order of your bitmap legend.
Levels don’t have to be kept track of in a legend, you should store them in a variable yourself.
You can call setMap to clear the game and load a new level:
const level = map`...`
setMap(level)
You might want to keep track of multiple levels using an array to switch between them mid-game:
const levels = [
  map`...`,
  map`...`,
  // etc.
]
setMap(levels[0])

// Later:
setMap(levels[1])
setSolids(bitmapKey)
Solid sprites can’t overlap with each other.
This is useful for creating things like walls:
const player = "p"
const wall = "w"

setSolids([ player, wall ])
setPushables(pushMap)
Use setPushables to make sprites push other sprites around. The sprite on the left will be able to push all sprites listed on the right.
const player = "p"
const block = "b"

setPushables({
  [player]: [ block, player ]
})
Watch out! Make sure everything you pass to setPushables is also marked as a solid or they won’t be pushed around.
width()
Get the width of the current map.
height()
Get the height of the current map.
Sprig has eight inputs w, a, s, d, i, j, k, l.
Typically w, a, s, d are used as directional controls.
Do something when the player presses a control:
onInput("d", () => {
  // Move the player one tile to the right
  getFirst(player).x += 1
})
Runs after every input event has finished being handled. Useful for tasks like checking win states:
afterInput(() => {
  if (getAll(block).length > 0) {
    console.log("you win")
  }
})
Sprites and Tiles
Each tile can contain any number of sprites stacked on top of each other.
Sprites contain:
{
  type
  x
  y
}
You can move the sprite by setting x and y.
The bitmapKey can also be changed to update the rendered graphic and collision rules the sprite will follow.
sprite.y += 1
sprite.type = "p"
You can remove a sprite with sprite.remove().
getTile(x, y)
Returns a list of the sprites in the specified tile.
tilesWith(type, …)
Returns a list of the tiles that contain type.
tilesWith(block)
tilesWith accepts multiple sprite types.
tilesWith(block, player, ...)
addSprite(x, y, spriteType)
Creates a new sprite of the given type.
clearTile(x, y)
Removes all sprites from the specified tile.
getAll(type)
Returns all sprites of the given type.
If no bitmap key is specified, it returns all the sprites in the game.
getFirst(type)
Returns the first sprite of a given type.
Useful if you know there’s only one of a sprite, such as with a player character.
Shortcut for getAll(type)[0].
Text
addText(string, options = { x, y, color })
You can add text with optional x, y, and color.
In Sprig, each color is represented by a single character. Like bitmap and map, you can use the color keyword to pick a color for your text. A preview of your selected color will also show next to the character.
For example:
addText("hello", {
  x: 10,
  y: 4,
  color: color`3`
})
clearText()
Clears all text on the screen.
Music and Sound Effects
Sprig comes bundled with a built-in sound engine and sequencer! You can use this to write background music, or with a high BPM to make sound effects.
You can create a tune with the tune keyword.
As usual, click on the button to open an editor window.
// Create a tune:
const melody = tune`...`

// Play it:
playTune(melody)

// Play it 5 times:
playTune(melody, 5)

// Play it until the heat death of the universe:
const playback = playTune(melody, Infinity)

// Or make it shut up early:
playback.end()
Infinite loop detection
The Sprig editor will automatically insert a heuristic in your for, while and or do-while loops to detect potential infinite loops.
Code looking like
while (condition) {
  // do stuff
}
will become
startTime = performance.now()
while (condition) {if (++_loopIt > 2000 && performance.now() - startTime > 1500) throw new RangeError("Potential infinite loop")
  // do stuff
}
Note that all original line numbers in your code will be preserved.